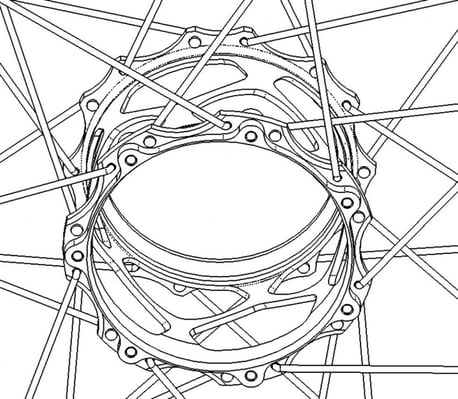
As we have seen in previous posts, the large hub flange diameter and symmetric hub flanges make the SWAP shell an ideal base for a strong and lightweight wheel.
Wheel building on the Kindernay SWAP shell is pretty straightforward, there are a few things to be aware of, namely the extra spoke length vs. regular flange designs, and the specific lacing pattern and direction of the spokes exiting the shell.
Here are some hints and tips for a wheel build on the standard sized (135/142/148mm version) Kindernay SWAP shell.

The first step is to determine the correct spoke length.
This is easily done by entering the hub specific info into a spoke length calculator.
We use the Wheelpro spoke calculator: https://www.wheelpro.co.uk/spokecalc/
Here is the Kindernay XIV specific hub data that will be entered into the spoke length calculator:
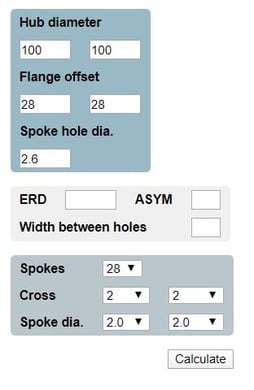
- Hub/flange diameter left side: 100mm
- Hub/flange diameter right side: 100mm
- Flange offset left side: 28mm
- Flange offset right side: 28mm
- Spoke hole diameter: 2.6mm
- Number of spokes: 28
- Lacing pattern left side: 2 cross
- Lacing pattern right side: 2 cross
When the hub specific info is entered into the calculator, it looks like below. Note: for the example, we are using 2.0mm spokes:

Note that the calculator requests three values called ERD, ASYM and ‘Width between holes’, and they are specific for the rim that will be used. Here is what they mean:
ERD means Effective Rim Diameter. This very important information is usually printed on the rim sticker. If not, it is available from the rim manufacturer (usually listed on the website).
ASYM: This value is 0 for most rims, but some rims have asymmetrically drilled spoke holes. For those rims, the ASYM value is available from the rim manufacturer.
‘Width between holes’ is the sideways distance between the spoke holes. This is usually very close to zero, but on so called Plus rims, and in particular, Fatbike rims, this value can be substantial, and must be entered into the calculator.
So far, everything is quite normal, but there are two specific things to keep in mind when finding the spoke length and later when lacing the spokes into the SWAP hub shell.
Spoke length
Due to the staggered spoke hole pattern of the shell, it is important to add 2.5-3mm vs. the calculated spoke length. For example, if the spoke calculator calculates a spoke length of 273.2mm, the correct spoke length for the Kindernay XIV SWAP shell will be 276mm.
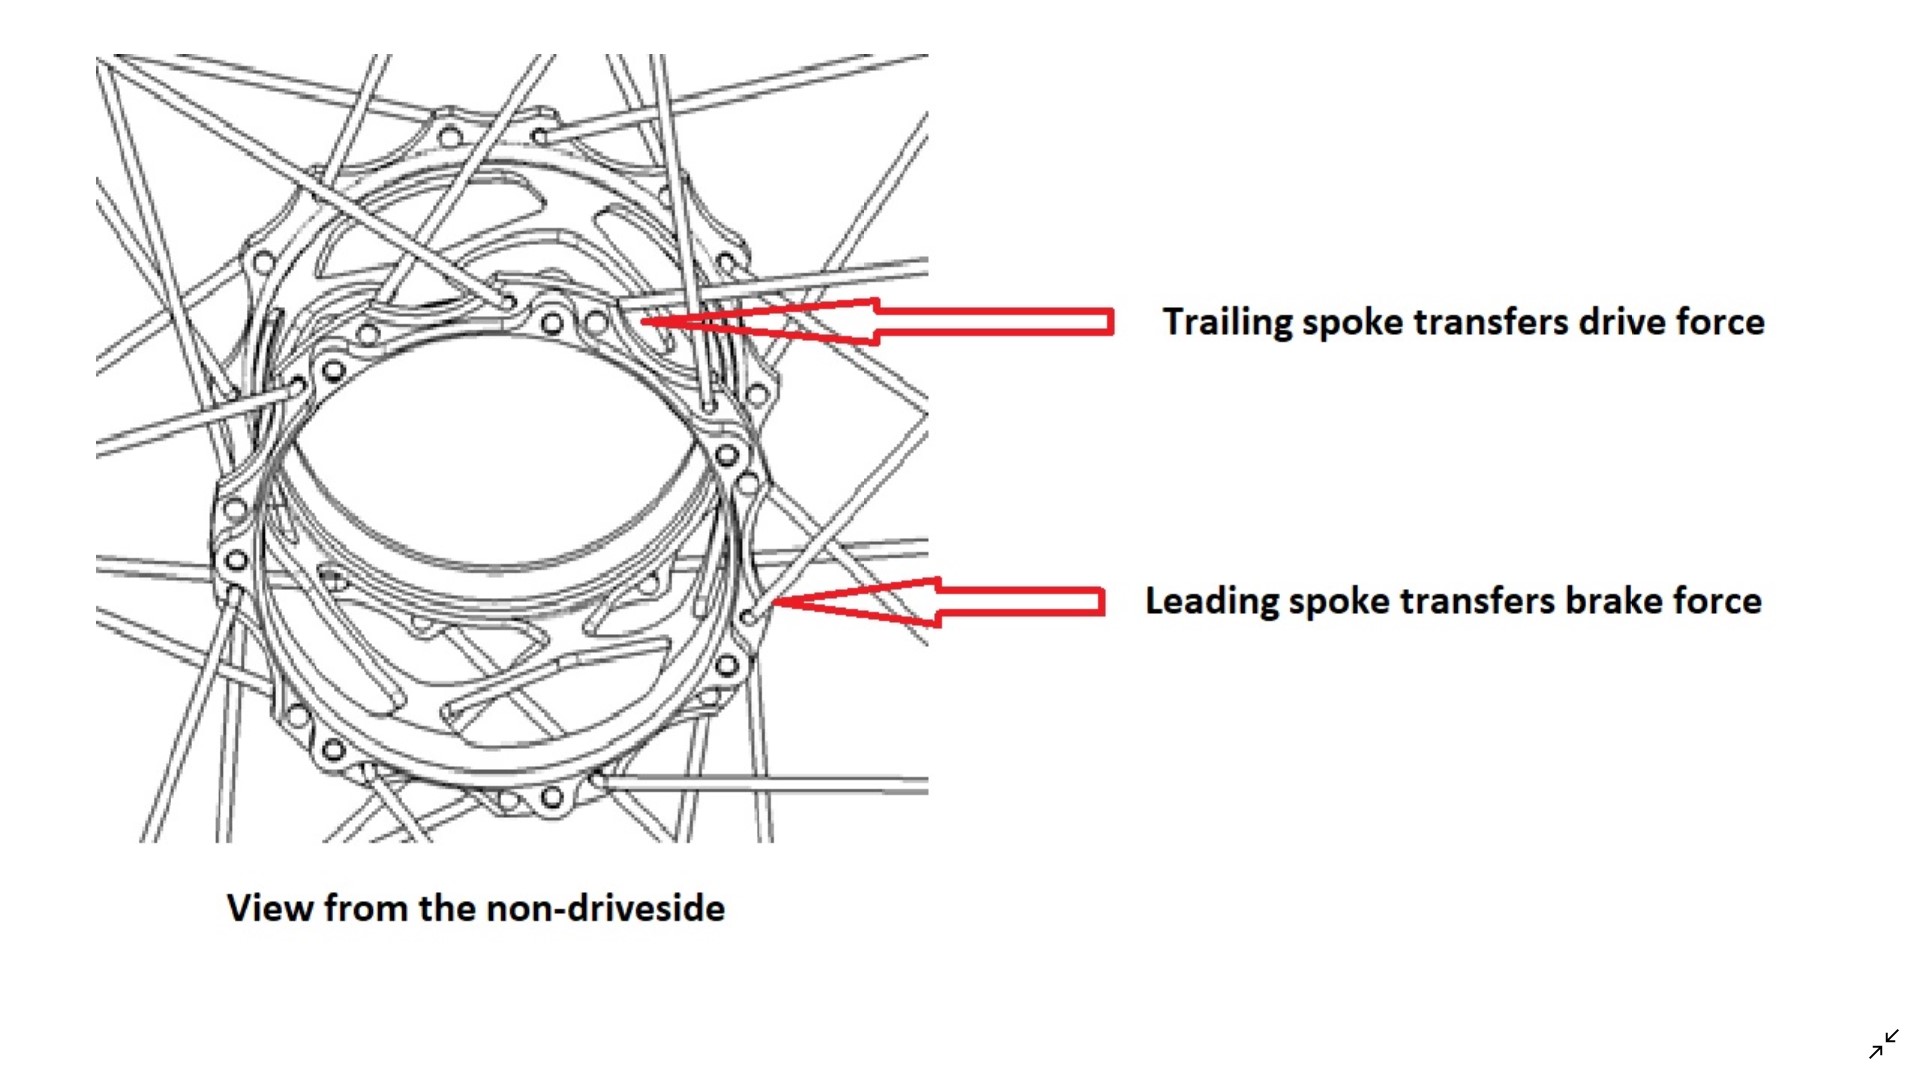
When the spoke length is determined, and we have the correct spokes in hand, we need to pay extra attention to the lacing pattern. On the Kindernay XIV hub, we lace the so called ‘trailing spokes’, from the outside and in.

The so called ‘leading spokes’ are laced from the inside and out.
The ‘trailing spokes’ spokes transfer drive torque and the ‘leading spokes’ transfer braking force. The reasoning behind this lacing pattern is to reduce bending loads and fatigue on the hub flange on the SWAP shell.
When the lacing is done, the rest of the job is just like any standard bicycle wheel. Easier than most, in fact, due to the symmetric hub flanges and equal spoke tension between both sides.


Comments